How to Draw a Bear: Easy Step-by-Step Drawing Tutorial for Kids
Are you ready to draw a cuddly forest friend? Today, we are going to learn how to draw a cute, friendly Bear! This tutorial is specially designed for kids and uses a simple, geometric shape-based approach. By breaking the bear’s face down into basic ovals and circles, you’ll be amazed at how quickly you can create a wonderful cartoon animal. For another big, strong animal with just as much personality, take a look at our Gorilla tutorial.
Materials You’ll Need
Step-by-Step Easy Bear Tutorial
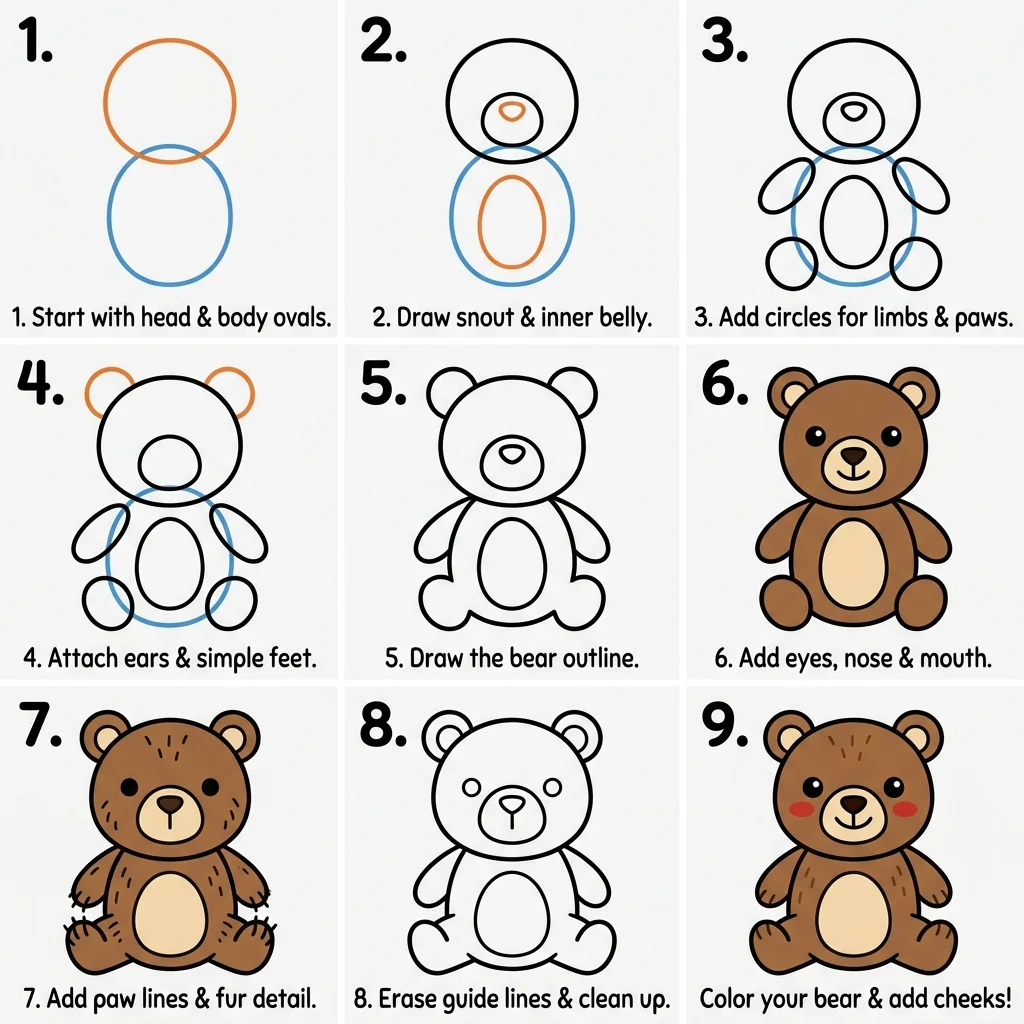
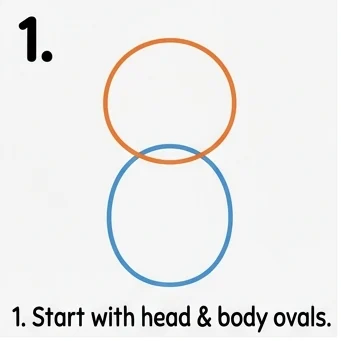
Start by drawing an oval for the head. Right below it, draw another slightly larger oval for the body so they overlap.
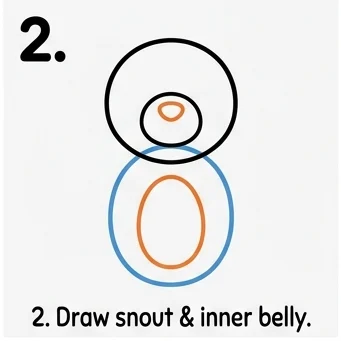
Draw a smaller oval inside the head for the snout. Then, draw an oval inside the body for the bear’s fluffy belly.
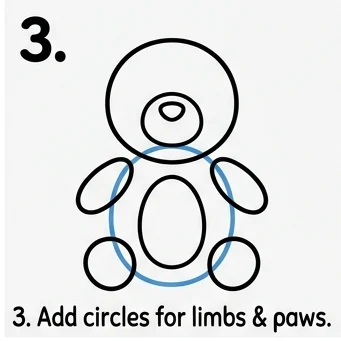
Draw two oval shapes overlapping the top sides of the body for the arms. Draw two circles at the bottom corners for the feet.
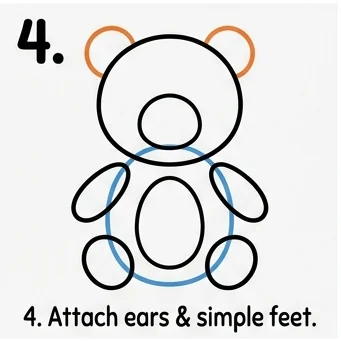
At the top of the head, draw two simple half-circles for the ears. Make them nice and round!
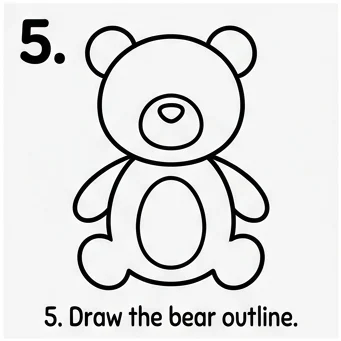
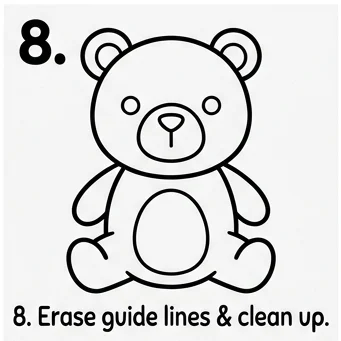
Erase the overlapping lines inside the body so the arms and legs connect smoothly to the main body shape. Trace the final outline.
Draw two small circles for the eyes, an upside-down triangle for the nose, and a curved smiling mouth below it.
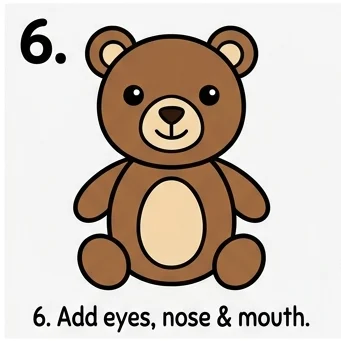
Add three little lines to each of the four paws to make fingers/toes. Draw small dashed lines on the head and body to look like fuzzy fur.
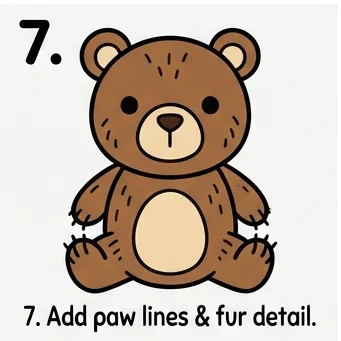
Take your black marker and trace over all the final lines to make the drawing bold and clean. Erase any extra pencil smudges.
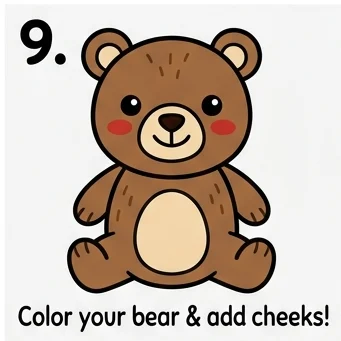
Time to color! Color the main part of the bear brown, and the snout and belly a lighter tan color. Don’t forget to add two cute red circles for cheeks!
Try drawing your bear in different poses! You can make a waving bear by changing the arm position, or a sleeping bear by closing the eyes. Once you master the basic shape, the possibilities are endless!
Frequently Asked Questions
❓ People Also Ask
A bear drawing starts with basic ovals and circles! You need a large oval for the head, a bigger oval for the body, small circles for paws, and half-circles for ears. These simple shapes make it easy for kids of all ages to draw a bear.
Use brown for the main body and a lighter tan or cream color for the belly and snout. Add pink or red circles on the cheeks for a cute kawaii look. You can also try different colors like white for a polar bear or black for a panda!
Yes! Our bear drawing tutorial is designed to be beginner-friendly. By breaking the bear into simple geometric shapes like ovals and circles, even young children ages 4 and up can follow along and create a cute bear drawing they’ll be proud of.